T-FIT® Clean, moulded from ZOTEK® F high-performance PVDF foam, is the leading insulation tailored for clean room environments found in pharmaceutical, semiconductor and highly controlled production environments.
T-FIT® Clean can be used to address condensation control, energy conservation, or provide personal protection, and can be installed around internal or external hot/cold, waste, chilled, specialist process, refrigeration and HVAC pipework.
Product and tape specifications
Sealant/Adhesive specifications
Before starting T-FIT Clean installation
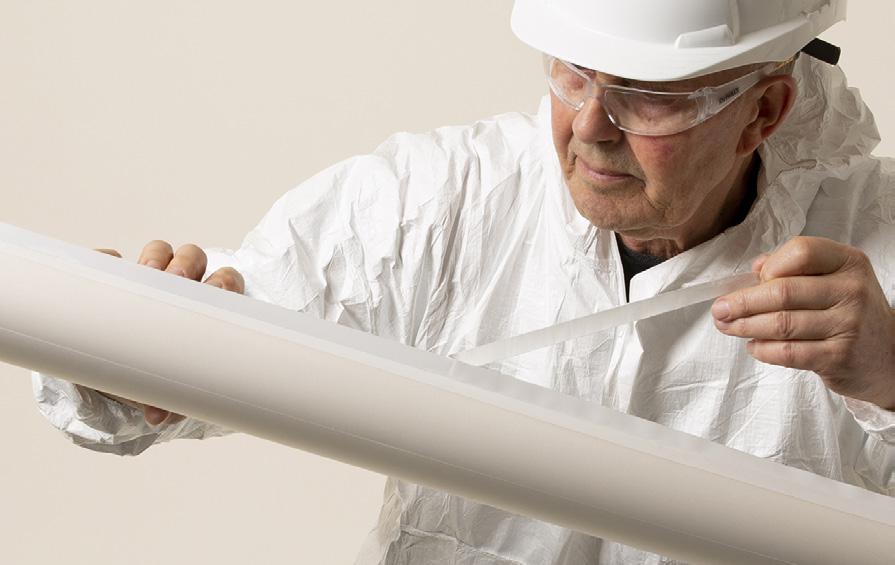
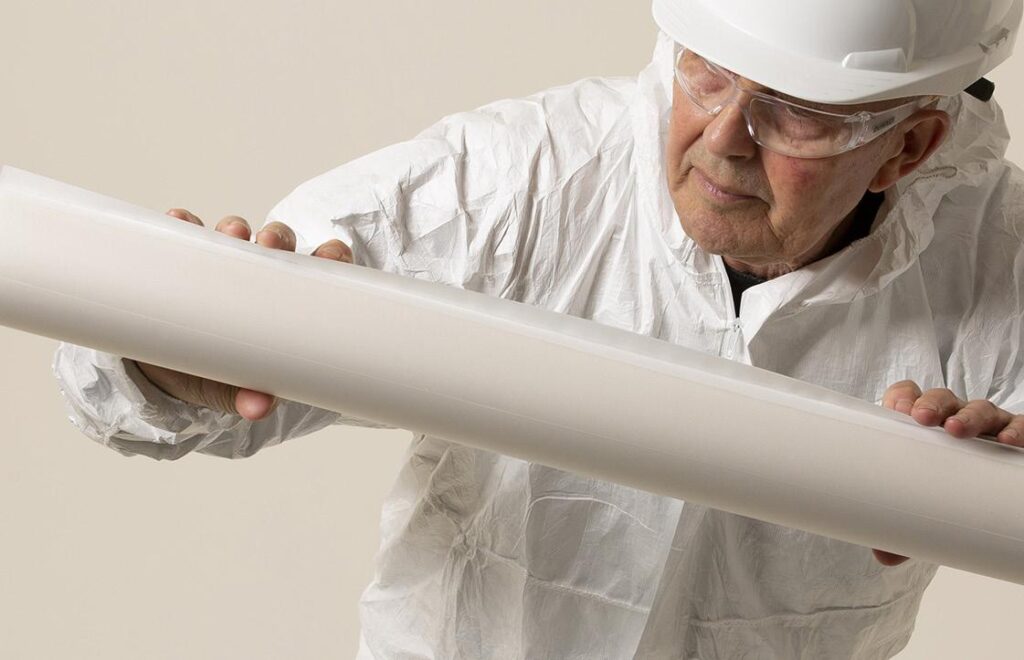
- Suitable gloves must be worn at all times when handling T-FIT® Clean to ensure the product remains clean, and free of dirt, dust or grease that can be easily transferred during handling with unprotected hands.
- T-FIT® Clean should not be installed in extreme temperatures or high levels of humidity as these conditions can adversely impact the performance of tapes and sealant. In general, minimum environmental temperatures should not fall below 15°C / 60°F, while max temperatures should not exceed 40°C / 105°F.
- Pipework or any surface to be insulated should be free of contaminants, oil, grease, water/moisture etc. Any foreign matter must be wiped clean ahead of installation.
- T-FIT® Clean is packed in bags and should be removed from the packaging only prior to installation. Care should be taken to keep the installation environment as clean and dust free as possible.
- T-FIT® Clean should not be installed on live plant or processes, whether this is hot, cold pipework or ducting. Pipe/duct work should be allowed to return to ambient temperature before any installation takes place.
- T-FIT® Clean should not be stretched to fit, please ensure the correct dimensions prior to installation.
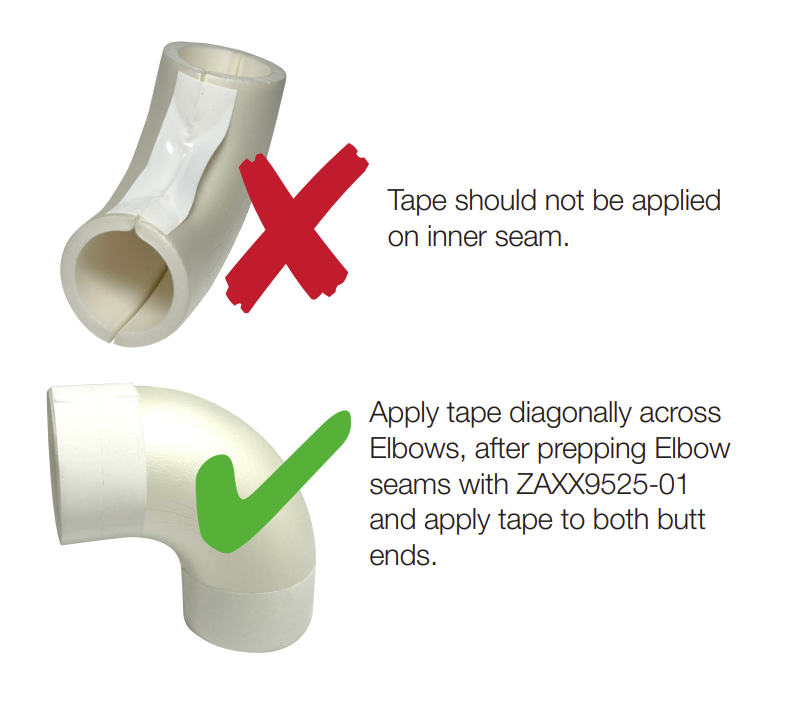
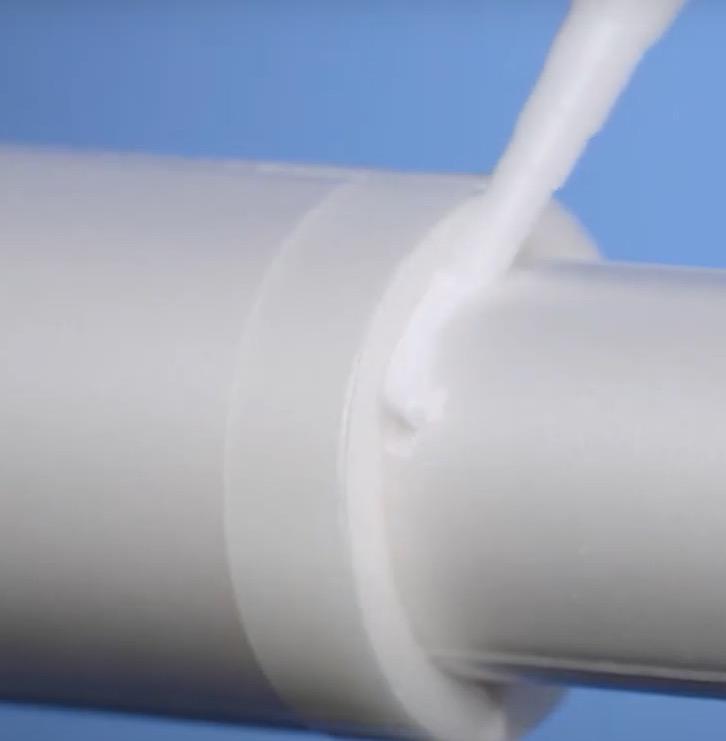
- Use of sealant on all joints is considered mandatory on T-FIT® Clean installation, and is used to seal all longitudinal joints, butt joints between tubes, assembly of elbows, tee’s etc. and fitting of insulation boxes.
- When applying sealant to joints, ensure that the insulation does not accidentally bond to the pipework. T-FIT Clean insulation should be able to expand and contract independently relative to the pipework.
- Tubes and sheet should be installed under compression, with insulation cut so that a slight excess of material pushes the joints closed.
- In general, fittings around elbows, tee’s etc. should be installed first, followed by straights, fitted under compression as detailed above. Insulation boxes are the last part to be installed and this completes installation of T-FIT® Clean.
- In hot and humid environments, tapes should be applied as quickly as possible to T-FIT® Clean following removal of the release/backing film, to prevent premature drying of adhesives.
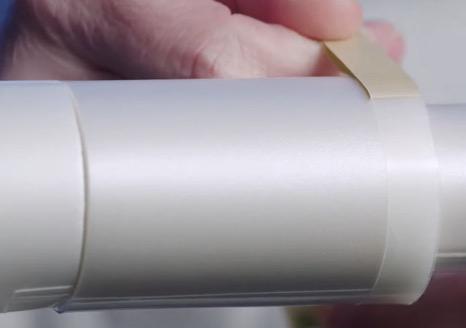
- T-FIT® Clean tapes are pressure sensitive activated (PSA). To ensure adhesion, a constant pressure must be applied along the entire length of the applied tape onto the T-FIT product.
- Take care to ensure an even and consistent application of sealant is applied when making joins and ensure all gaps are fully adhered and sealed. This is especially important for cold/chilled lines, where contact between ambient air and the surface of the cold/chilled pipework can create condensation.
- Longitudinal seams running the length of the tube and butt joints between tubes should be made with sealant and secured with tape.
- T-FIT® Clean is a closed cell material so water vapour barrier/outer cladding/jacketing systems are not required. However, care should be taken to ensure all seams and joints are fully sealed and vapour tight around elbows, tee’s and insulation boxes etc.
- If needed, fabrication of fittings, elbows, tee’s, etc. should take place in a suitable workshop/workstation type environment. T-FIT® Clean recommended sealant typically requires 6 hours to cure. Planning and fabrication of fittings ahead of install is highly recommended, making installation on site much faster, easier, and improving overall workmanship.
- With care, as an alternative to 15. above, fittings can be assembled around elbows, tee’s etc, using existing pipework as a former. As an example, a segmented bend can be built up around the actual bend one segment at a time, ensuring each segment is adhered to each other with the use of sealant. Tape around each segment joint should be applied after the sealant has cured, usually 6 hours after initial application.
Tools required for installing T-FIT®Clean
Long bladed knife ~300mm/12”, straight edged, non-serrated, for cutting tubes in a mitre block.
Mitre block which allows for accurate cutting of tubes at 90°, 45°, 22.5°, 15°, 11.25° angles, simplifying fabrication of segmented elbows.
General measuring tools, including flexible tape measure, steel ruler, callipers to measure tube diameter, straight edge to cut against, marker pen, small knife, scissors. Where holes need to be cut into T-FIT products, for example fabricating a tee fitting or installing an insulation box, such openings are easy to make with the aid of a sharpened tube of appropriate size.
Preparing to install T-FIT® Clean
- Always use sharp knives and cutting equipment, with good quality tools in general.
- T-FIT® Clean products should be installed in a dust free, clean environment, with pipework cleaned prior to install.
- Installation requires the use of tapes and sealant to make all good joints. Special care must be taken to ensure the insulation surfaces remain free of dust/dirt.
- Reminder – T-FIT® Clean tapes are pressure sensitive activated (PSA). To ensure adhesion, a constant pressure must be applied along the entire length of the cladding/tape.
- Reminder – Care must be taken to ensure an even and consistent application of sealant is applied where required, with care taken to ensure all gaps are fully adhered and sealed.
- Reminder – Installation of fittings around bends, elbows, etc. should be the starting point of any installation, followed by installation of straights, cut to length and installed under compression, followed by fitting of insulation boxes.
- Reminder – always wear gloves when handling T-FIT® Clean. Remove from packing only when ready to install.

Typical order of work
- Review installation and estimate quantities of fittings (e.g. elbows, bends etc.) required to complete the install.
- At the work site, ensure the plant is not active and pipework has reached ambient temperature.
- Check pipework is generally clean and free of dust and contaminants. Wipe down as required to ensure cleanliness.
- Install fittings, elbows and tee’s before straights.
- Straights should be cut slightly oversize to allow insulation to be fitted under compression, pushing butt joins closed.
- Insulation boxes complete the T-FIT® Clean installation process.
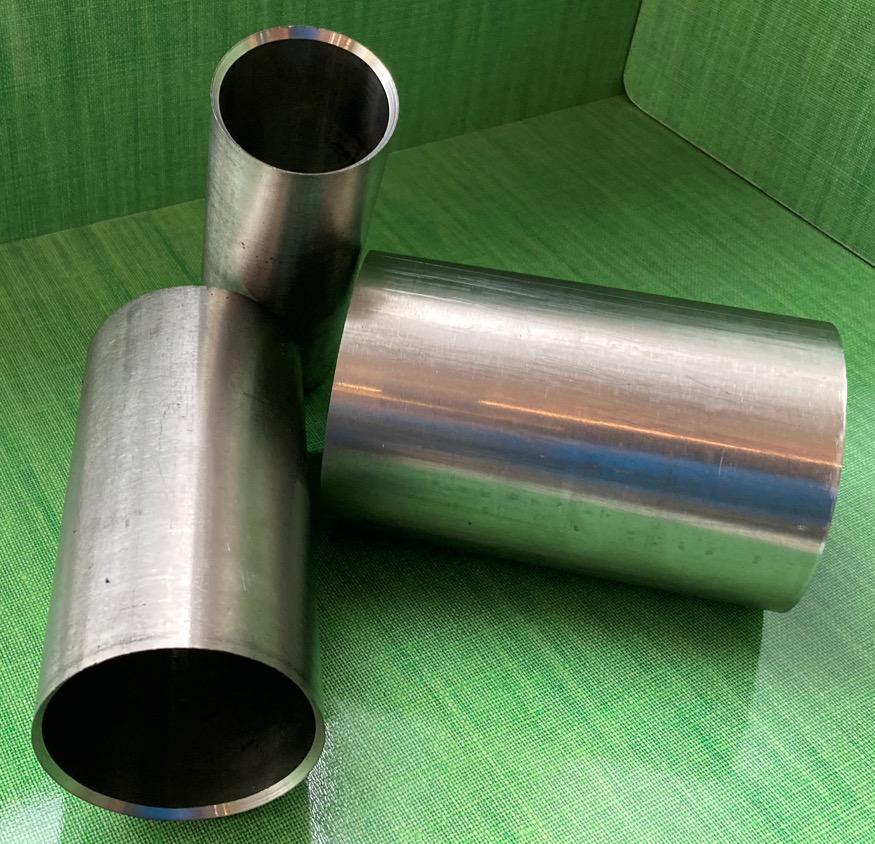
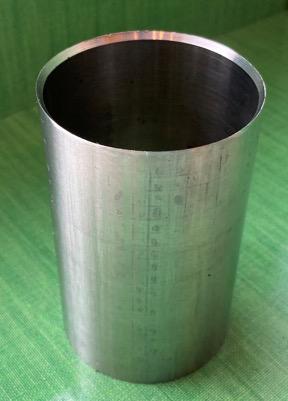
1: Straights
Further details are available at T-FIT.org with video showing the install process: watch installation process.
In general, elbows, tee’s, etc. should be installed first. Straight lengths are then measured and cut to fit tightly under compression against the installed fittings.
Using a sharp knife and mitre block, cut the Hygiene tube to length as required. The mitre block helps to ensure an accurate perpendicular cut.
Unpick a short length of the cladding adhesive tape liner at each end – this is easier to carry out ahead of installation around pipework, then install insulationaround pipework.
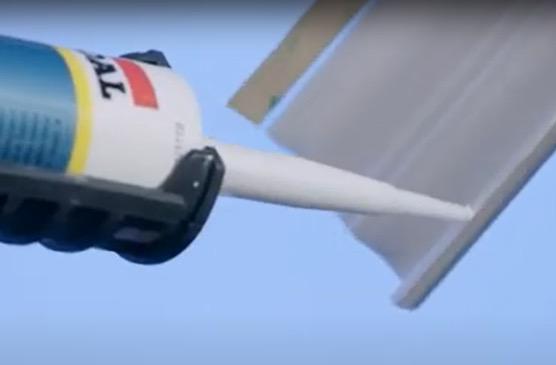
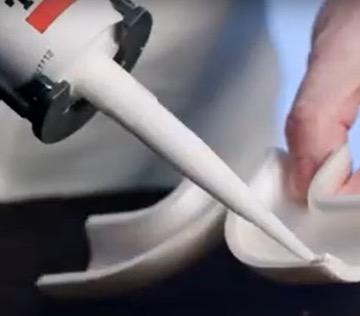
Apply sealant down the length of the tube, and to the ends of the tube to make good butt joints.
Use of sealant on all joints is considered mandatory for T- FIT® Clean installation, and is used to seal all longitudinal joints butt joints between tubes, assembly of elbows, tee’s etc., and fitting of insulation boxes.
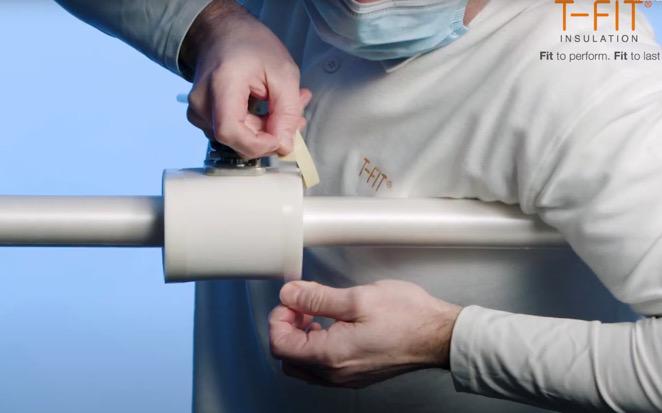
Remove the tape backing liner to expose the adhesive
Applying even pressure over the whole length of the tape, squeeze the join to secure the joint.
2: 90-degree eblow
Further details are available at T-FIT.org, with video showing the install process: watch installation process.
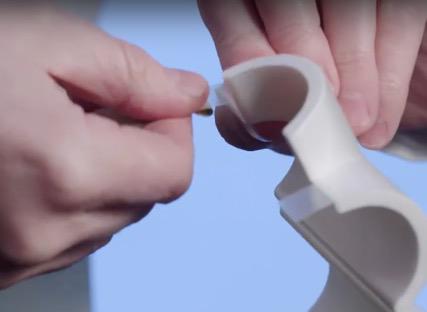
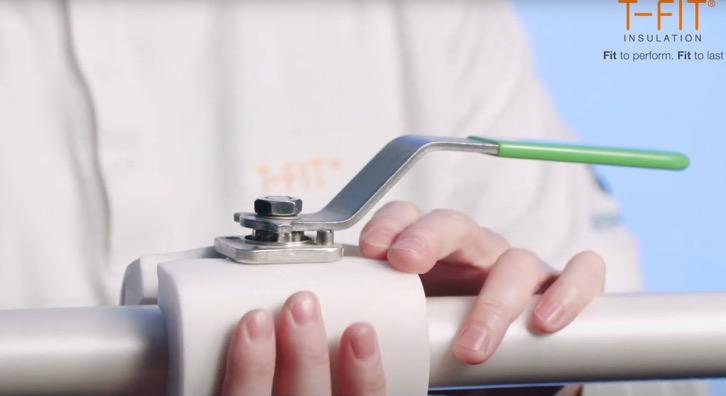
90-degree elbows are supplied as moulded parts.
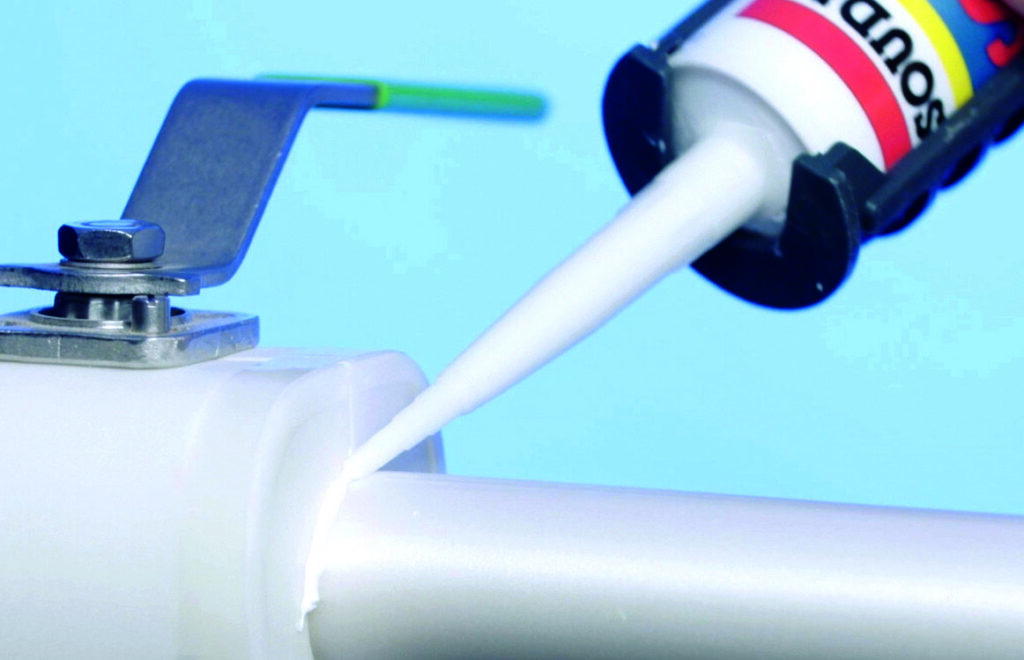
Apply sealant to the outer edge of the fittings, close up the elbow and leave for ~6 hours for the sealant to cure.
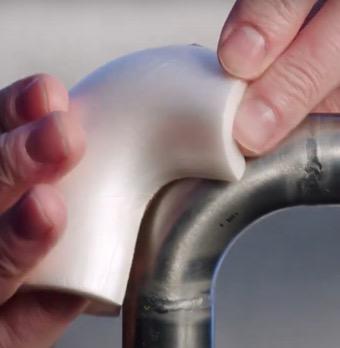
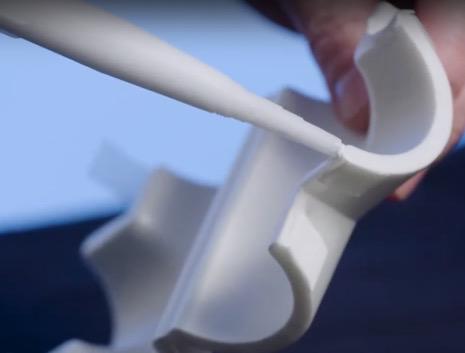
After the sealant has cured the fitting is installed around the elbow, and sealant applied to the internal edges.
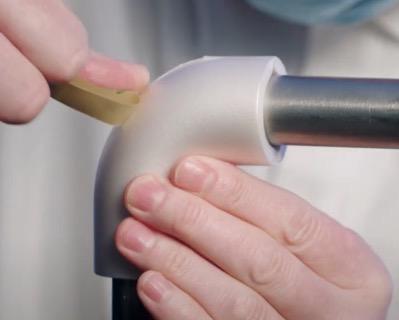
The fitting is secured with tape cut down to 12.7mm width, applied around the throat of the elbow.
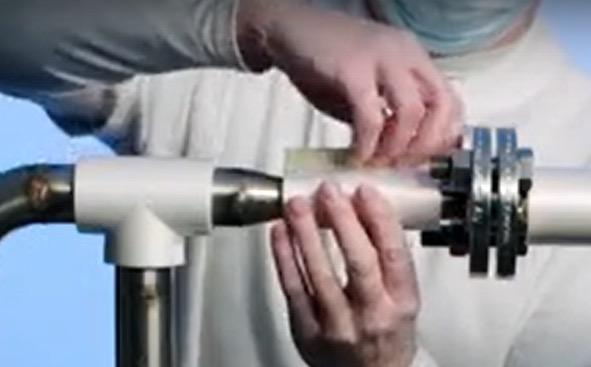
3: Reducer
Further details are available at T-FIT.org, with video showing the install: watch installation guide.
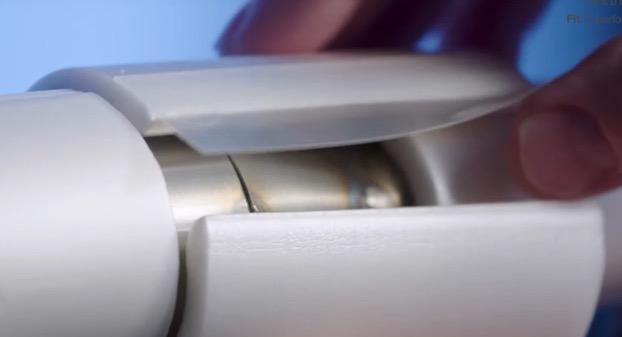
Changes in diameter of pipework can often be accommodated by careful selection of existing T-FIT® Clean insulation tube sizes. Example a 50mm/2” pipe reducing to 38mm/1.5” can be insulated with 50mm and 38mm T-Fit® Clean tubes respectively, given wall thickness of 6.35mm/¼”, the 50mm Clean can easily overlap the smaller 38mm insulation.
Carefully apply sealant to the longitudinal join of the smaller insulation tube, in this example the 38mm / 1.5” tube.
Install the prepared T-FIT® Clean tube.
Carefully apply sealant/adhesive to the longitudinal join, and the end of the second insulation tube, preparing the butt joint to the next item of insulation. In this example the 50mm / 2” tube.
Install the second prepared T-FIT® Clean tube.
Apply tape to both ends of the larger, overlapping tube.
Apply sealant to the overlapping join between the smaller and larger T-FIT® Clean tubes.
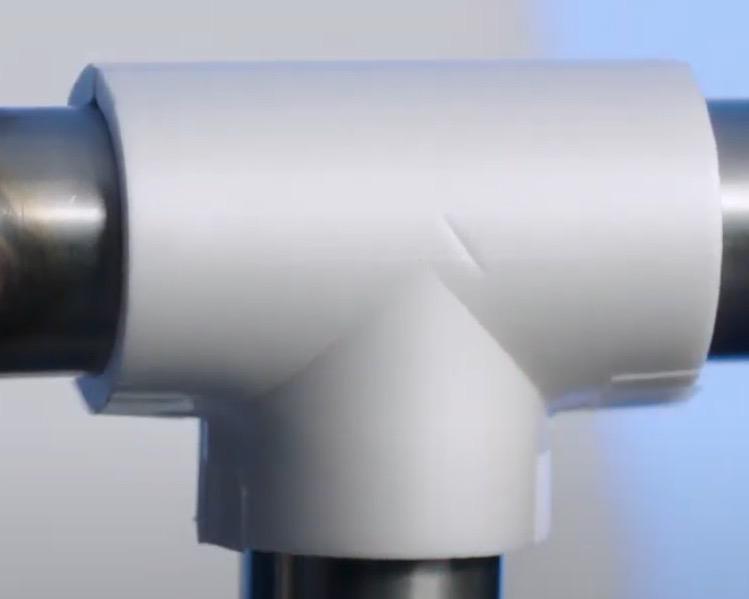
4: Tee
Further details are available at T-FIT.org, with video showing the install: watch installation guide.
Insulating tee’s starts with preparing a moulding part.
Apply tape cut down to 12.7mm width to the tee fitting.
Carefully apply sealant to the fitting edges
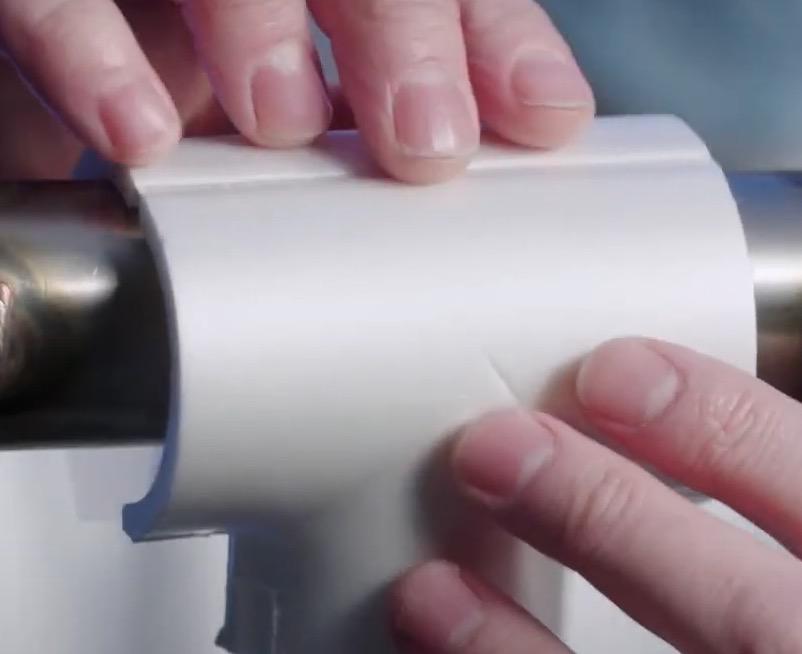
Install the prepared tee fitting.
5: Insulation Box
Further details are available at T-FIT.org, with video showing the install process: watch installation guide.
T-FIT® Insulation boxes can be used to insulate valves, flanges and other pipeline equipment. Available in various sizes, please contact the T-FIT team to select insulation boxes of appropriate dimensions.
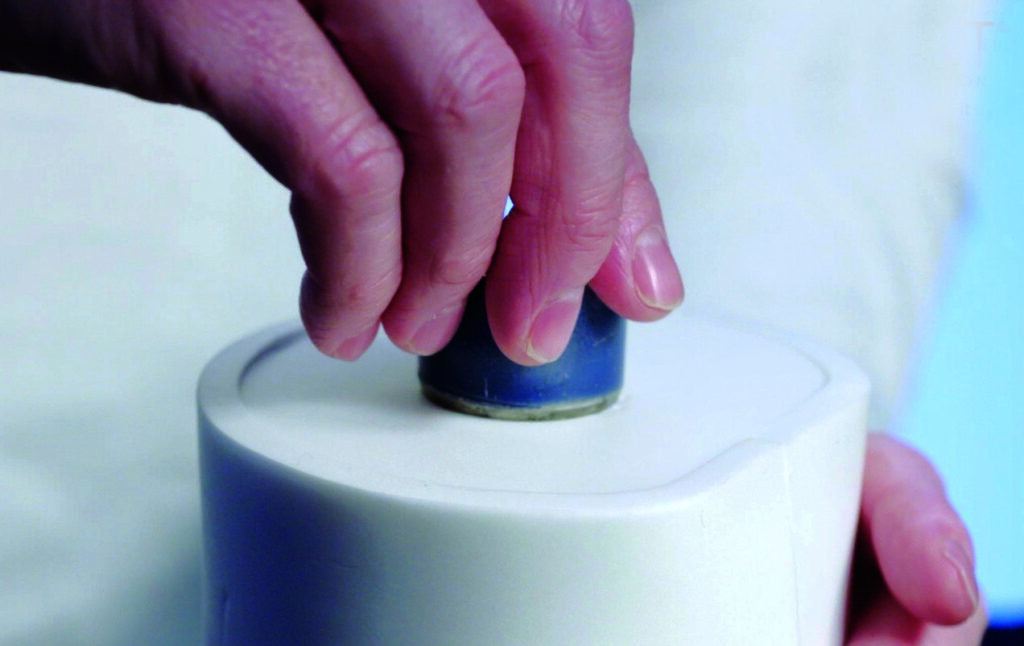
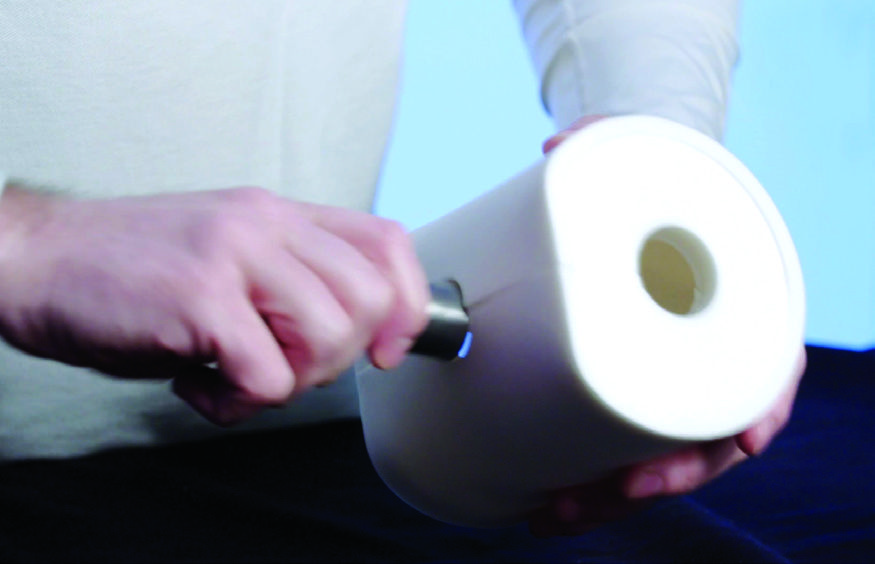
Using a sharpened piece of tube (see page 5), cut a hole in each end of the Insulation box appropriate to the outer diameter of the insulated pipework into which the Insulation box is to be fitted.
For fitting around a valve as per example, cut a third hole into the top of the Insulation box to accommodate the valve stem.
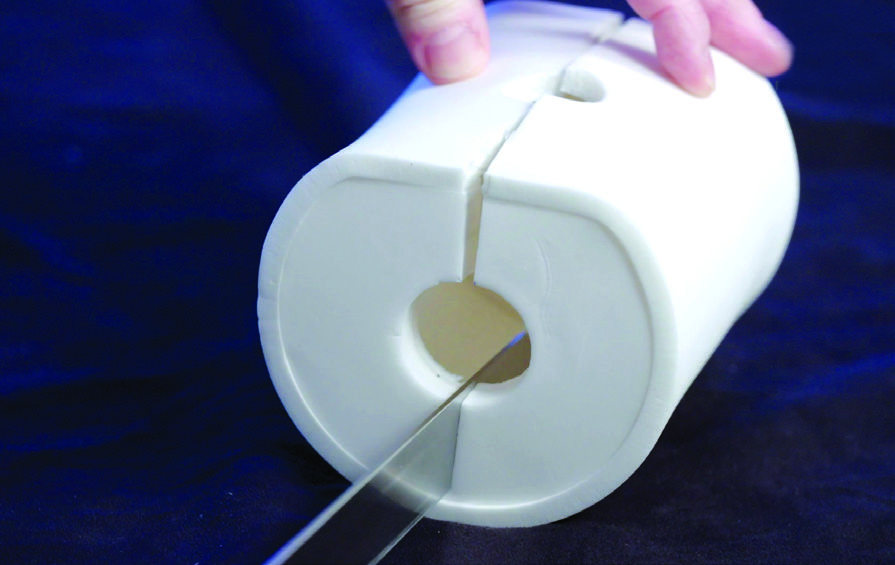
Carefully cut the Insulation box down the centre stopping just short of the bottom layer of insulation.
Open the Insulation box and install around the valve, closing the two halves to complete the installation.
Apply sealant to the joints around the box, and tape to the ends to firmly secure in place.
Exclusion of Liability
Any information contained in this document is, to the best of the knowledge and belief of Zotefoams plc and of Zotefoams Inc. (together herein referred to as ZOTEFOAMS), accurate. Any liability on the part of ZOTEFOAMS or any subsidiary or holding company of ZOTEFOAMS for any loss, damage, costs or expenses directly or indirectly arising out of the use of such information or the use, application, adaptation or processing of any goods, materials or products described herein is, save as provided in ZOTEFOAMS’ conditions of sale (“Conditions of Sale”), hereby excluded to the fullest extent permitted by law.
Where ZOTEFOAMS’ goods or materials are to be used in conjunction with other goods or materials, it is the responsibility of the user to obtain from the manufacturers or suppliers of the other goods or materials all technical data and other properties relating to those other goods or materials. Save as provided in the Conditions of Sale no liability can be accepted in respect of the use of ZOTEFOAMS’ goods or materials in conjunction with any other goods or materials.
Where ZOTEFOAMS’ goods or materials are likely to come into contact with foodstuffs or pharmaceuticals, whether directly or indirectly, or are likely to be used in the manufacture of toys, prior written confirmation of compliance with relevant legislative or regulatory standards for those applications may be requested from ZOTEFOAMS, if appropriate. Save as provided in the Conditions of Sale no liability can be accepted for any damage, loss or injury directly or indirectly arising out of any failure by the user to obtain such confirmation or to observe any recommendations given by or on behalf of ZOTEFOAMS.
ZOTEFOAMS MAKES NO WARRANTIES EXPRESS OR IMPLIED, EXCEPT TO THE EXTENT SET OUT IN THE CONDITIONS OF SALE, AND HEREBY SPECIFICALLY EXCLUDES ANY IMPLIED WARRANTY OF MERCHANTABILITY OR FITNESS FOR A PARTICULAR PURPOSE WITH RESPECT TO ANY GOODS, MATERIALS OR PRODUCTS DESCRIBED HEREIN.
T-FIT® and ZOTEK® are registered trademarks of Zotefoams plc. All rights reserved. Issue 1 April 2024